Welcome to our latest installment of “Hello, Smart Home,” a video series where we head inside customers’ houses and apartments to see how they’re using SmartThings to secure their homes, gain peace of mind, and complement their preferences and patterns.
Today, we meet Craig, a tech manager who recently married his college sweetheart and moved with her into their first house.
Check out the other videos in the Hello, Smart Home series.
Want to recreate Craig’s smart home setup in your crib? Here’s how:
Items:
• 1 SmartThings Hub
• Free SmartThings app
• 1 Dropcam
• 1 Aeon Labs Multi-Sensor
• 1 Honeywell Z-Wave Thermostat
• TCP light bulbs or a smart in-wall dimmer or switch to control overhead lights
• 2 SmartSense Motion sensors
• Philips hue bulbs
• Philips hue LightStrips
• 1 SmartSense Multi Sensor
• 1 Evolve Relay Switch
Optional:
• Vicious attack dog
How to: Get Pictures When There’s Someone At Your Door
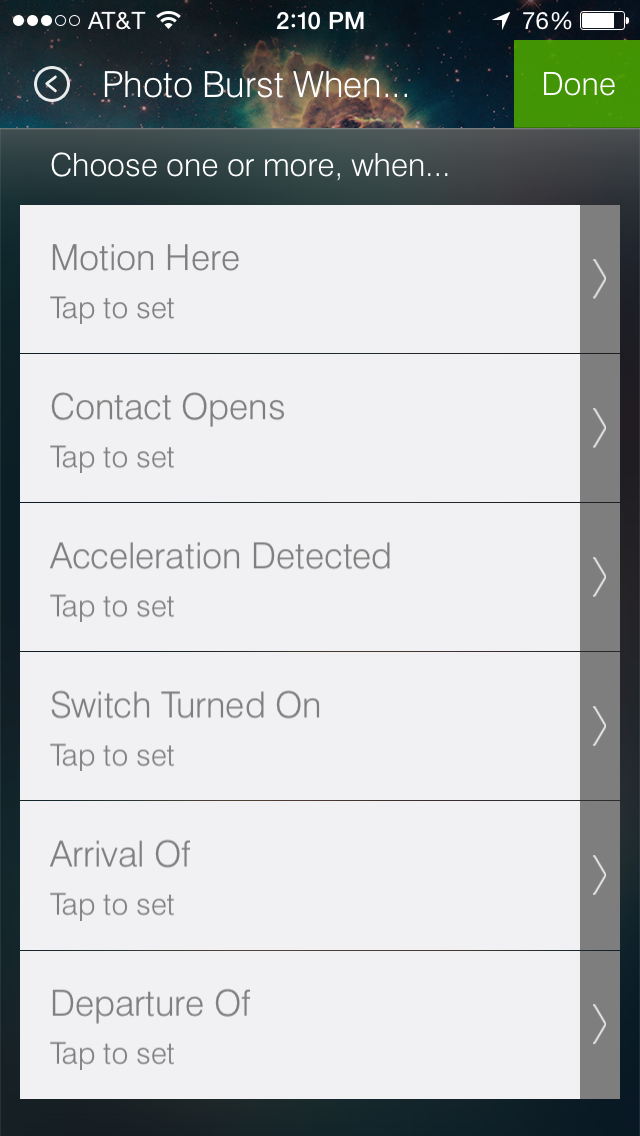
 While Dropcam is an indoor camera, you can use it with SmartThings to snap pictures of outdoor activity whenever there’s movement placing your Dropcam by a window facing outside, by placing an outdoor Aeon Labs Multi-Sensor nearby, and then by using the “Photo Burst When” use case in SmartThings Labs.
By using the Photo Burst When, you can set Dropcam to take photos when different things take place (such as when someone arrives home, when there’s motion, when something open unexpectedly, etc.); customize whether you’d like to receive push notifications in addition to images; schedule your Dropcam so that it takes a photo every x amount of minutes and sends it to you; or request that Dropcam take a rapid-fire “photo burst” of five consecutive images when various actions and events.
How to: Control a Smart Thermostat
 After installing a SmartThings-compatible thermostat, you can adjust your heating or cooling with a simple swipe of the app in the Things screen.
You can also set your thermostat to automatically adjust when different events take place–such as when you arrive or leave home, when you’re asleep, or when you’re watching a movie–by using the Hello, Home section of the SmartThings app. To do so, just select the Hello, Home phrase that corresponds to you leaving (ie: “Goodbye!), arriving (“I’m back”), asleep (ie: “Goodnight!”), and so forth; select “Set the thermostat”), select your smart thermostat, set your preferred temperature, and that’s it!
Here’s a quick demo video walking you through these steps:
How to: Set Lights to Automatically Turn On & Off When People Come & Go
Craig keeps a SmartSense Motion sensor in his kitchen facing the hallway and his living room. Whenever it senses movement, it triggers his overhead lights to come on. And when motion stops being detected for a few minutes, the lights automatically go off.
To do this, you’ll need to either install an in-wall switch or dimmer, or simply screw in some smart light bulbs (such as TCP or Philips hue). Then, you’ll use the SmartSetup section of the free SmartThings app to set up a new Action. Under the Lighting header, you’ll see a prompt reading “Turn on when there is motion.” Bingo.
You’ll then select the light or lights you’d like to control and select the motion sensor that will trigger the light or lights to turn on. If you’d like to trigger the lights to turn off after people leave, simply select the toggle, and enter in the number of minutes after motion stops when you’d like for the lights to turn off. You can also select this action to occur only when SmartThings is in certain modes, only on certain days of the week, and so forth.
Here’s a quick demo video walking you through these steps. (Note: To trigger your Philips hue LightStrip to turn on when there’s motion, you’ll follow these same steps.)
How to: Control Philips hue With SmartThings
You can integrate Philips hue and SmartThings by accessing the SmartThings Labs section of the SmartThings app (available under SmartSetup –> More). Here’s a narrated video showing you how you can control your Philips hue bulbs directly from the SmartThings app.
How to: Open, Close, and Automate Your Garage Door
You can open and close your garage door the same way that you can control a light, lamp, Crock-Pot, or other electronic device with SmartThings: simply by tapping a button in the app. But to do so, you’ll first need to install a relay switch. We recommend the Evolve Z-Wave LFM-20 module.
 You’ll also want to place a SmartSense Multi sensor on your garage door. Since the Multi has an accelerometer in it (which measures angle), this will be able to tell you if your garage door is open or closed. (Otherwise, you’ll just be sending “turn on,” “turn off” commands to your garage door without knowing if it’s already open or closed. No bueno.)
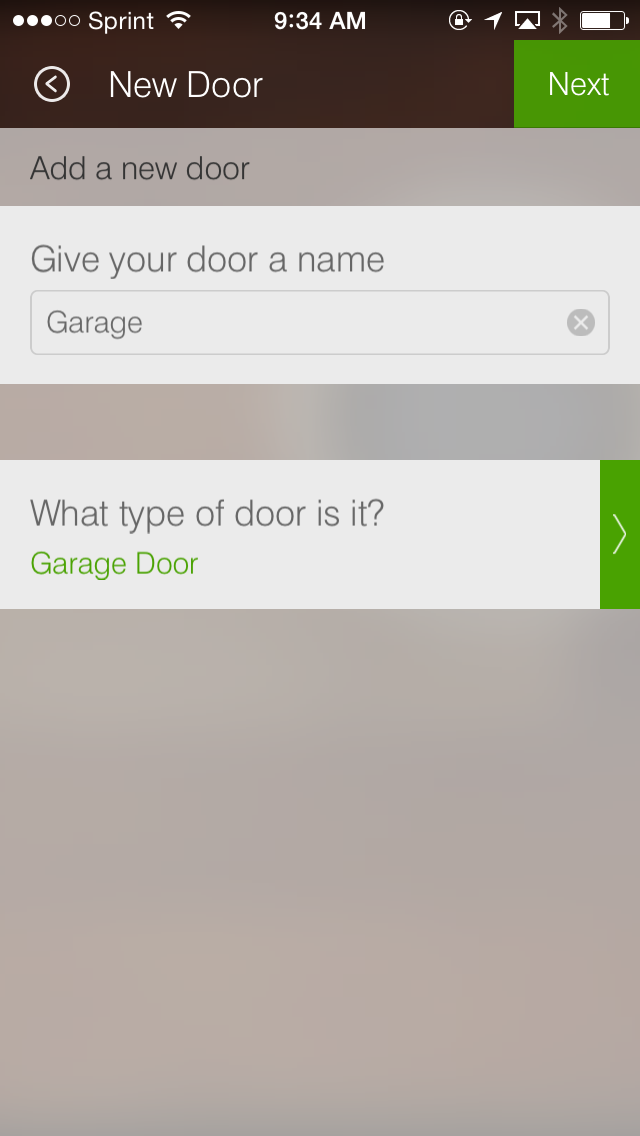
You can also trigger your garage door to automatically open and close when different events take place–such as when you drive home and then leave home. The easiest way to set this up is to go to SmartSetup, search for the Evolve Z-Wave LFM-20 module, tap on the “Top alerts and actions” prompt under the product listing in SmartSetup, add a new door (specifying that it is a garage door, when prompted), select the Multi sensor that you’ve placed on your garage door, and then follow the subsequent steps specifying when the garage door opens and closes based on who in your home is coming and going.
Here’s a quick demo video walking you through these initial steps:
And finally, Craig has been able to integrate his ADT system with SmartThings. It should be noted that this is not an official integration, and that this is something that Craig was able to do on his own. In this post on the SmartThings Community site, Craig describes the steps he used to do this. We recommend that you check ADT’s terms and conditions before trying to recreate this.


