A customer gets an alert in the middle of the night from SmartThings that there is water pouring into his basement.
Everyone has a story to tell. We want to hear yours. To have your story about SmartThings featured, please check out our submission guidelines and send it on over to reimaginereal@smartthings.com. This story first appeared on Chris Compton’s blog and was republished with his permission.
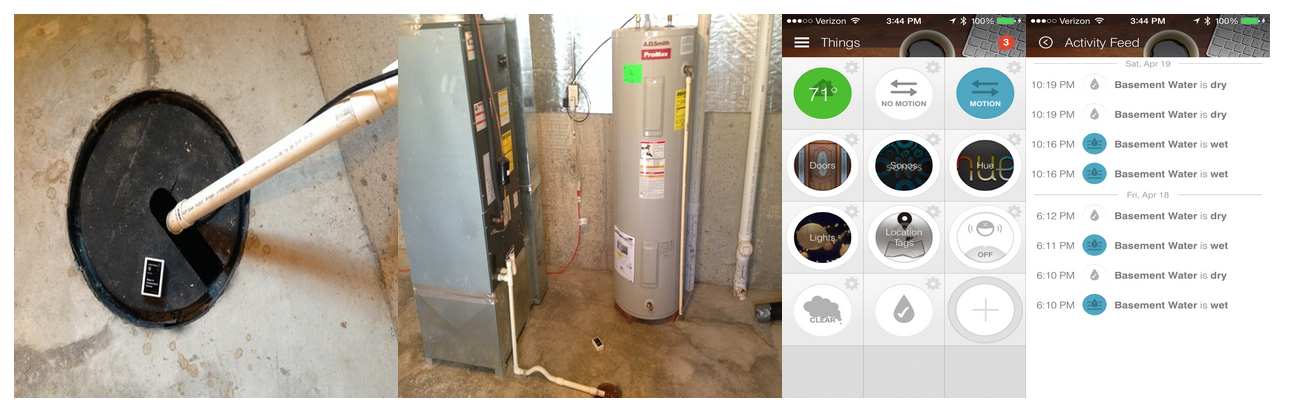
April 19th I was awakened by my SmartThings siren, I quickly received an alert on my phone which informed me the basement moisture sensor was wet.
I quickly turned off the siren. Too late: the kids were now awake as well (which is fine with me, what if it was fire and not water?). I quickly went to the basement. Turn’s out I’m not that good of a plumber!
This winter, we had the pipe to our external water spout freeze and burst. During the replacement, I decided to install a gate-valve which has a waste port to help prevent the pipe from freezing. This valve would also allow me to turn off the water to the spout in the winter to keep the line dry. Unfortunately, the rubber washer at the waste port failed and water was pouring out into my basement.

Thanks to SmartThings, I was able to quickly shut off the water supply to that pipe and clean up the water before it caused any damage. Peace of mind indeed.

Here is how you can do this as well:
Supplies:
- SmartThings Hub
- Siren – Utilitech from Lowe’s
- Water Sensor – FortrezZ
Steps:
- Purchase and Install a SmartThings Hub.
- Purchase a Moisture Sensor and link it to your Hub.
- Purchase and link a siren. There are other kinds, I picked the Utilitech from Lowe’s due to it operating on batteries which allowed for greater placement options.
- Install a SmartApp or use the SmartThings Dashboard to set up what you want to happen when the sensor gets wet.
- Enjoy!

What else can be done with SmartThings? A LOT. Here is a quick video on how I use SmartThings to light up the stairway at night, Philips hue to show me a visual on the weather, and Sonos to tell me the local forecast as well.
If you want to do the above you will need the following. Interested in a setup/walkthrough guide on my setup? Just reach out on Twitter or leave a comment on my blog post.
- Philips hue
- Z-Wave Switch and your choice of a lighting setup, I use a LED Rope.
- Aeon Labs Motion and Light Sensor
- Sonos Play 1 (in Video) or any other Sonos setup.
- Helpful tip for Sonos:
- You do not have to have the Sonos Bridge if you can have at least one speaker plugged into an ethernet cable. However, you don’t have to have the speakers plugged into Ethernet if you have a Bridge plugged into an Ethernet cable. The Bridge also acts like a range expander to help with wireless coverage.
- Sonos speakers use their own wireless mesh network for communications. Only one of your Sonos devices need to have an ethernet network connection to pull in your media and online streams.
- Helpful tip for Sonos:
Popular Tags
Subscribe for more articles like this!
Your email address
[contact-form-7 id="831e457" title="Contact form"] You may opt-out at any time. Privacy Policy.Learn more about becoming a SmartThings partner.
Work With Us
Inspire the world and create the future of IoT at SmartThings.